Today was a wed-ding (pronounced wed - *DING*, as in ding-a-ling) extravaganza. Most of it was terribly boring (did you know that Target is the only place in town that sells tissue paper in attractive colors? neither did I). That is the unfortunate thing about planning a wedding--it makes you incredibly boring.
Kind of like graduate school, really.
So let's talk shoes, instead. I love shoes. This may surprise some of you, since I have only 6-8 pairs that I wear regularly--hardly a shoe lover's collection. Unfortunately, although I would love to give them my money, the shoe industry is apparently uninterested. As I previously mentioned, I am freakishly tall, so it is unsurprising that I have feet to match--a pair of size 11 beauties. Although my shoe size is not particularly out of proportion, given my height (my grandmother, on the other hand, was 5 feet tall with a size 9 shoe--talk about stable!), it does put me squarely outside of the mainstream of women's shoes. How far outside? Well, I was getting pretty tired of my wed-ding extravaganza, and so I happened into a DSW shoe--not because I needed anything, but because I couldn't stand to go to one more store looking for tissue paper. I realized that only the clearance rack was arranged by size, so I went back there to take a look. But then I remembered why I usually don't go into these stores. While there were 2-3 racks of the sizes up to 9, and 1 rack of size 10, the rack called "size 10 and up" contained...come on...take a guess.
Four pairs of size 11 shoes.
Four. Pairs.
All, by the look of them, designed for transvestites.
I should have known--why else would you have a rack of size 10 and a rack of size "10 and up," unless you wanted to hide the fact that you don't actually carry the "and up" part of the equation? Can you tell that this gets a wee bit frustrating at times? Where are the cute green satin heels in my size? The tweed pumps? The fushia ballet flats? The sassy red maryjanes? Nowhere...and so I'm stuck with a selection of orthopedic beige pumps and nurse's flats, looking longingly over at the size 8 rack.
So when you see me wearing the same old, tired pair of shoes, think of them as a trophy--a hard-won pair of (formerly) attractive shoes that I can't bear to part with because, frankly, I would have nothing to wear on my feet.
Monday, April 28, 2008
Thursday, April 24, 2008
More Smoky Goodness...
By the way, if you want to see more shots of the smoker, feel free to check out my flickr set.
Adventures in Cooking Part 1: Smoked Pork

I've wanted to try building a do-it-yourself smoker since I saw it on the barbecue episode of Good Eats (I told you I liked that show). So last week, I went out to get the parts for the smoker, and I spent most of Saturday outside, drinking beer and watching the smoker do it's thing. Verdict: I could definitely think of worse ways to spend a lovely spring day.
In case it isn't clear from the following am *very* proud of myself with this one--the smoker worked swimmingly and the pork was outstanding. So here's the run down in case you feel the desire to make one yourself. (NOTE: try this at your own risk. I am NOT responsible if you shock yourself/burn your house down/ruin a perfectly good piece of meat. I'm just not.)
But first, since this is a long post, I'll provide a kind of summery.
By the numbers:
$42.25 = total investment in materials for the smoker
7 pounds = weight of the pork shoulder used
8 hours = total time the pork spent in the brine
3 am = time I got up on Saturday morning
1-1/2 = bags of wood chips burned
2 = number of flareups (otherwise known as "grease fires") we had that day
12 hours = total time the pork spent in the smoke
15 = number of happy people fed
The smoker elements
1 large terra cotta pot (17.00)
1 terra cotta saucer with the same diameter (11.00)
1 replacement grate for a kettle grill (8.00)
1 hotplate with a dial thermostat (3.50 at the AA recycle center)
1 metal pie or cake pan (.25 at the recycle center)
1 metal stick-type thermometer (2.50)
1 extension cord ("free" in that I already owned one)
2 cinderblocks (ditto)
The smoking supplies
2 bags of wood chips
1 piece of heavy-duty aluminum foil (I didn't use this, and later wished I had)
1 watering can
1 fire extinguisher
1 lawn chair
1 tasty beverage
The assembly and use of the smoker
Here is an image of the smoker assembled (in my front yard--my sleeping hosta garden is in the background)

The large terra cotta pot on the bottom acts as a vessel for the rest of the elements. The earth walls of the pot aid in heat flow and retention--it is the same reason that fancy, expensive smokers have ceramic walls, and people still roast pigs in pits in the ground. In this case, I basically picked the cheapest pot I could find that was large enough to fit a grate. The cinderblocks not only give the whole thing a kind of junkyard chic, they also let a small amount of oxygen flow into the smoker through the hole in the bottom of the pot. The lid of the smoker was selected via a very scientific method--basically, I tried terra cotta items one at a time until I found something with the same diameter as the pot (believe it or not, it was the only item that had that characteristic). I was trying to find something with a hole in it (to put the thermometer in) but the saucer turned out to be useful--I rested the meat on it while changing the wood chips. The thermometer is a replacement for a turkey fryer. It worked great and cost us 2.50 at Meijer.
 In the bottom of pot is the heat source for the smoker--a basic hot plate, which I picked up at the local recycle center for 3.50. The original plans had the hotplate in the bottom of the smoker, with the cord coming out of the hole in the bottom of the pot (clever, eh?). We modified this plan somewhat by taking the hotplate apart and rewiring the guts to go through the hole in the pot.
This achieved three things:
1)It left only the metal parts of the hotplate inside the pot---the plastic housing remained outside, underneath the pot. Thus, we avoided the fumes that would presumably result from leaving plastic in a 210 degree oven for 12 hours.
2)My hotplate had a dial to control the heat. This turned out to be key, because the line between partial combustion/smoke and full combustion/fire is a finer one than you might think. Dissecting the hotplate meant that I could adjust the heat from outside the pot--a real plus, as you will soon see.
3)We got to feel like real badasses. We will feel even more badass once we figure out a mounting mechanism for the bottom of the pot, so that it doesn't produce alarming blue sparks when fiddled with.
 On top of the hotplate goes the metal pie tin full of wood chips. The pie plate I got at the recycle center (I don't think I would want to use it for anything else). The chips are hickory and mesquite--I got them at the local garden center/cooking supply store (be sure to use hardwood that is not treated chemically, because whatever funky tastes and chemicals are in the wood will be in the smoke, and thus in your pork). The chips should smoke, BUT NOT CATCH FIRE. We had two flareups worthy of the name--the first was at about 4am. I had just put the thing together and had no idea how high the heat should be. I turned it up too high, and the chips caught fire. Fortunately, the dial was outside the pot (see?) and I could turn off the plate, take out the thermometer, and suffocate the fire (the hole in the bottom doesn't let in enough air for fire to continue). The second fire was the result of grease dripping on the wood chips--the next time, I'm going to cover the chip pan with foil and poke some holes in it. That should both prevent it from catching fire (less oxygen) and prevent grease from getting on the wood itself. Just in case, I had a fire extinguisher on hand. I changed the chips whenever the smoking stopped--I used about 1-1/2 small bags of wood over 12 hours of smoking.
Above the chips rests the grill grate, and on top of it, the pork shoulder. The sides of the pot are slanted, so the grate should just rest in the pot without falling down. This suspends the meat about 6 inches above the heat/smoke source, letting hot air and smoke flow around it.
The whole thing is topped by the cover and the thermometer.
The Pork
I bought a 7 lb pork shoulder (bone-in, untrimmed). Fortunately, barbecue is designed to make cheap cuts of meat delicious, so the meat itself was (relatively) inexpensive. We brined the pork overnight in a mixture of molasses, pickling salt, and water. In the morning (3am--*yawn*) I extracted the pork and sprinkled it with a mixture of chili powder, onion flakes, cumin, fennel, corriander, and paprika. I smoked the meat with both hickory and mesquite chips for around 12 hours (4am-4pm), trying to keep the smoker at 210-220 degrees (in reality, it sometimes got as high as 250). We ate it with some truly outstanding Carolina-style (vinegar and hot-pepper based) sauce that a friend brought. As I mentioned earlier Ross also made a lovely omelet out of the leftovers.
Doesn't this make you want to try it?

Wednesday, April 23, 2008
An Ode to Owning your Food (or why mayonnaise and frosting are more similar than you think)
As is true of many geek-cooks, I am a serious devotee of Alton Brown--the creator and host of the Food Network Program "Good Eats". This show is a great resource for people (like me), who don't feel truly comfortable with a process unless they completely understand it. Good Eats is nice for that, because in addition to telling you what to do, Alton Brown tells you why you're doing it.
Here's an example--suppose you want to make mayonnaise. Whereas the usual cooking show (or cookbook) would simply tell you to "add the milk to the eggs very slowly," Alton Brown will tell you 1)When you make mayonnaise, you are making an emulsion, 2)An emulsion is a fine mixture of fat molecules and water molecules 3)Because fat and water don't mix, emulsions are very sensitive, and thus require an *extremely* slow introduction of the fats to water 4)If you screw this up, the fats will start to glob together, and the emulsion will "break".
What's so great about the latter method of learning to cook? A couple of things--first of all, learning the science behind a particular recipe can often give you insight recipes that may initially seem unrelated. For instance, once you know that mayonnaise is an emulsion, you can apply your knowledge about making mayonnaise to other emulsions--like buttercream frosting (which is an emulsion of eggs and butter). If you learned to make mayonnaise from an ordinary recipe, then you wouldn't necessarily know about emulsions, and the relationship between mayonnaise and buttercream would remain obscure. Without knowing their relationship, getting from mayonnaise to buttercream would be no easier than getting from mayonnaise to meringues. Placing those two foods in the same category, makes buttercream a variation on mayonnaise (strange, I know) and makes getting from one to the other much easier.
Secondly, knowing the science behind food lets you know why you are doing what the recipe tells you, and more importantly, when you don't have to. This makes altering an existing recipe much much easier. It is much easier to make substitutions when you know the purpose of each ingredient, and what other ingredients serve that same purpose. For example, in some recipes, a liquid serves only to keep something wet (in which case, feel free to substitute buttermilk for vinegar if you think that would somehow be tasty) whereas in others it serves another purpose as well, such as making a food more acidic (in which case, you would have to confine your substitutions to other acidic liquids).
On a more philosophical level, knowing how your food works is important because without that knowledge, I don't think that you can really call yourself a cook. As with many things, I feel that knowing how things work gives you an ownership over them, in a way that merely following directions does not. I didn't feel like I really owned my bike until I learned how all of it's component parts worked, and I don't feel like I own a food until I know how it's component parts work. That level of ownership is really liberating, because it leaves you free to wander as you please, with a reasonable chance of getting where you're going in the end.
Next post--Adventures in Cooking!
Happy Birthday to me
Today's my birthday, and what with the wedding coming up in 10 days or so, I gave Ross permission to skip it this year.
But this morning, I woke up to Ross handing me a smoked pork, spinach and tomato gruyère omelet in bed. Imagine my confusion--I had been wanting an omelet the day before, and there it was! In my bed with me!
It was absolutely beautiful and it was literally the best omelet I have ever had in my life. I just wish I had taken a picture before devouring it. But...well...it was so tasty!
Thanks babe...you're the best.
Tuesday, April 15, 2008
June just became my least favorite month...
This summer is going to be just a teeeensy bit crazy for me.
May
3rd: get married
5th - 19th: Hawaii
June
1st: Grinnell College Reunion
2nd - 4th: Talk to MAP students at Grinnell about agent-based modeling
6th - 8th: Printer's Row Book Fair (if my folks get a booth)
9th-11th: Resource Economics Conference in Toulouse
14th: High School Reunion (I wouldn't go, except my best friend is going)
21st: Wedding I'm photographing
July
13th-17th: Games 2008 conference
August
8th-?: Wedding in Czech Republic
All of this will be liberally interspersed with work (recall that I'm going on the job market next fall), gardening (R and I have rented a community garden plot this year), and house repairs/renovations (we are going to be selling 2 houses next spring).
At least it will be bookended by vacation!
Sunday, April 13, 2008
The long-awaited invite post....
 Our invitations are pretty. I like them very very much.
They were also a gigantic pain in the arse.
This post is basically an excuse to a) demonstrate what a gigantic pain in the arse they were and b) post some glamour shots of the finished product, which I am almost deliriously (read: delusionally) proud of.
So here we go:
The basic design is an accordion-folded interior leaf with two covers made of a heavier material. Design-wise, we had several things we were drawing from.

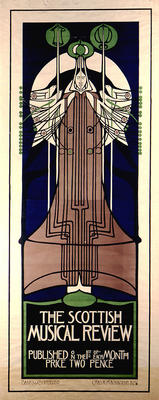
The cover is a riff on the art nouveau posters that Ross and I like so much--especially the designs of
Mackintosh.
I wish that I had pictures of us making these covers. A local print shop, Hollander's, will create a letterpress plate from your image, and let you use their equipment to print the image. It was perfect for us. We had a grand time.


Step 2: Stick two ribbons to each side.


Step 3: Attach the back cover...flip...attach the front cover.


Step 4: Tie 'em up.


And done!


This is the map of the Arb on the back (you have to untie the ribbons to find it). We hadn't intended it to be a puzzle, but we're not sure what fraction of people will find it. Too bad! I'm pretty proud of it...

If that didn't seem so bad, consider that we did about 90 of these...which meant cutting 360 pieces of ribbon, sticking down over 1000 glue dots, and tying 180 bows. But I think it was worth it (at least now that it's over).

Friday, April 11, 2008
If Science says it, then it must be so...
I often say that I am freakishly tall. And I am...here's the proof:

This is a chart showing the average height of white, American women by age. The red lines indicate different percentiles. So if you're height/age point is between the line marked 75 and the line marked 90, then you are taller than 75-90% of the white women in the US.
I am 5'11" tall (71 inches), which puts me significantly above the top red line for all age groups (I'm in my late 20s). Now, obviously, since the distribution of height is bell-shaped, the percentile lines would stretch out considerably near the top, but there is a case to be made that I'm in the top few percent of white American women, height-wise.
But Ross is also tall. In fact, while most people don't think of me as tall (until they realize that I am taller than all of the women in the room), everybody thinks of Ross as tall. Which raises the question: Who is the bigger freak, height-wise? I think that this chart answers that question definitively:

At 6'5" (77 inches) tall, Ross is even further above the 90% line than I am. By my incredibly scientific measurement, Ross is 3 black lines above the red line, whereas I am only 2-1/2 above it. So science says that Ross is a bigger freak. And if science says it, who am I to say differently?
******
If you're interested, I got these charts from this site The data is admittedly a little old (it is based off of the NHANES, which was collected between 1988 and 1994) but it gives you an idea.
Tuesday, April 8, 2008
Words Kate Hates, Part 1
I hate the word "pamper".
It hurts just to write it...the hard "p" sound followed by a soft "m"...
the super-extra-girly connotations, paired with an implication of utter frivolity... the strange association my brain makes between it and adult diapers.
I hate that word so much.
Unfortunately, I've been subjected to it a lot lately, because I'm getting married and therefore am required to participate in 650% more girly activities than usual. Just yesterday, I was getting my nails done and had to suffer through a certain amount of wedding chatter. The word "pamper" came up at least...I don't know...a MILLION TRILLION BILLION times.
So now hear this internet! You will never ever hear the word "pamper" come out of my mouth.
My (hypothetical, at this point) children will never wear "Pampers".
And most of all, I will never ever take "Pamperin".
Sunday, April 6, 2008
Sprung
Today was the most beautiful glorious day ever!
Have I mentioned that I hate winter? Especially winter in Michigan?
Yep. I love spring.
Have I mentioned that I hate winter? Especially winter in Michigan?
Yep. I love spring.
Tuesday, April 1, 2008
By the way...
A long post on the invite process is coming. I've received enough compliments on them that I figured I should put one together.
Eh, who am I kidding? I just want an excuse to illustrate the amount of sweat that went into them. Not to mention getting to take some glamour shots of the invites.
Eh, who am I kidding? I just want an excuse to illustrate the amount of sweat that went into them. Not to mention getting to take some glamour shots of the invites.
You can't escape...the nuptual industrial complex
Getting married comes with many new, and mostly unpleasant experiences. As soon as you set a date, you are suddenly exposed to the most ruthless, well-oiled commercial machine in the world: the nuptual-industrial complex.
I am truly amazed at the thoroughness of their attack. We started receiving wedding-related junk mail almost immediately after I bought my dress (coincidence? um...no). I wish that I had saved some of it and scanned it, because there were some real gems. My favorite was the chair cover brochure. Did you know that this was a thing? I mean, it never occurred to me that chair covers were a wedding accessory(tm), much less than there would be an entire company devoted to renting them out. The most amazing part was the cost--$2 per chair cover. That is the same amount I'm paying to rent chairs. And man oh man, are they terrible looking. If there is something fuglier than a chair cover, I'd like to know what it is.
Anyway...I have no idea whether this junk mail will ever stop. I mean, they apparently have no idea when my wedding date is, because they keep sending me information about venues--despite the fact that any self-respecting snooty country club event planner would laugh in my face if I expected to rent their space one month before my "event". Maybe I'll lose them when I move.
By the way, by far the creepiest part of the wedding industrial complex is on facebook (of all places). The instant I changed my relationship status to "engaged," I started getting ads for wedding junk in my sidebar, and even in my news feed.
Facebook is watching me.
I'm thinking of "facebook eloping" just to put an end to the visual spam.
Subscribe to:
Posts (Atom)